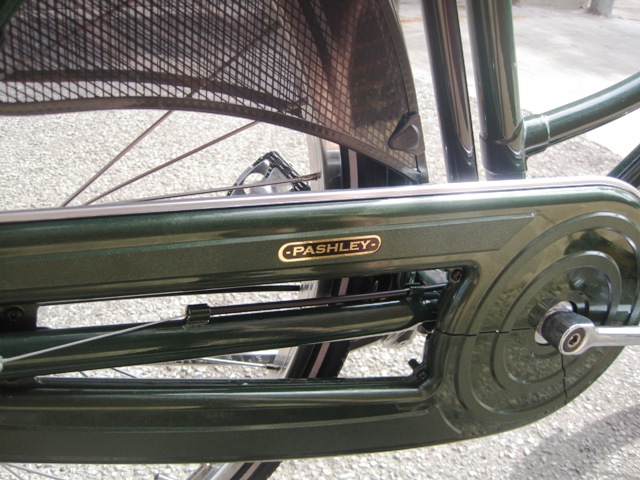
It's that time of year again. When Sunday comes it will be dark a lot of the time for anyone who works a conventional 9-5 shift pattern. This will be my second winter of riding with dynamo lights, with dynamos on all of the bikes this time, although still only enough lights for two of them; the Brompton and the DL-1. This is the perfect time of year to 'go dynamo,' not only for the long-term savings but, as I learned myself last winter, it's extremely liberating.
Some people hang up their bikes for winter. If you are a utility cyclist however, this is unlikely to be the case. I have ridden through every winter since I started cycling again as an adult. However, until last year I never really got any enjoyment doing it. Having to remember to take my lights everywhere, carry them around when off the bike was a minor hassle. What really bothered me was the persistent, nagging concern that I'd be caught out by flat batteries and have to risk a ride home without lights. The battery lights I had used in the past were adequate, but never truly that bright. I knew of the much brighter options available but the price never seemed justifiable to me, for something which could so easily become useless if forgotten of accidentally uncharged.
When I bought my first dynamo lamp, a
B&M Lumotec Retro N senseo plus, it was mainly because I was concerned with having a light which was in-keeping with the aesthetics of my then new-to-me
DL-1. English-language information regarding dynamo lights was pretty sketchy, I wasn't sure what I was going to get. Because of this, I was pleasantly surprised to find that the light I had purchased was actually a lot brighter than my previous battery-powered LED lights, despite being a halogen bulb. It was always there when I needed it and would even come on automatically when darkness fell. This started to change the way I felt about riding in the dark, from something to be avoided to something to relish. As that first dynamo winter drew in, I found myself riding as much as I had during summer.

Naturally, I had to get the rear light powered by the dynamo too, whilst permanently attached to the bike, the rear the battery light which came with the
DL-1 was still a weak link, dependent on batteries. Once again, information was lacking.
B&M produced rear lights with the same automatic light-sensor on/off control as the
Retro, although it seemed that this feature was only available with the battery or battery/dynamo hybrid models. Once again I took the plunge and purchased a
B&M D-Toplight Plus. The tail-light was wired into the connectors on the front lamp for this purpose; to my surprise the automatic light sensor in the front light also controlled the power supply to the rear light. When it got dark both lights would come on automatically (including when passing through a tunnel). Brilliant.

Having this kind of set-up on the
DL-1 made the
Yuba Mundo seem almost a hassle to ride. The
Shimano dynamo hubs available in my price range were all intended for use with
Centerlock disk brakes, rather than the standard 6-bold arrangement used on the
Yuba Mundo. The additional cost of a new
Centerlock rotor or an IS adaptor pushed the price to more than I could justify spending at the time. A post from
Lovely Bicycle! gave me the answer I was looking for, a bottle dynamo. Older bottle dynamos (and modern cheap ones) have contributed to the poor regard with which dynamo systems are viewed here in the UK. However, higher-spec bottles such as the
Nordlicht 2000 or the
B&M Dymotec seemed to offer a reasonable trade-off between performance and price.
I decided to opt for the Basil Nordlicht bottle dynamo in combination with with a
B&M Lumotec Lyt plus, a reasonably priced light with a higher light output rating than the
Retro. Due to budgetary constraints, an additional rear light would have to wait.

Unlike the
Sturmey Archer X-FDD hub dynamo on the
DL-1, the
Basil Nordlicht took a bit more work to find the optimum fitting. The advantage of the
Basil Nordlicht is that the rollers can be changed. Multiple variants are available including a steel roller for running on the tyre, a rubber roller for running on the rim and a larger rubber roller for running on the rim at higher speeds. The larger roller is particularly useful as it allows the dynamo to be 'geared down.' As bottle dynamos are typically designed to produce full power output at relatively low speeds (<10km/h) they can produce too much drag when used by faster cyclists. The larger roller compensates for this by reducing the amount of dynamo revolutions per tyre revolution, and hence the resulting drag. Initially the bottle dynamo was mounted on the fork, unfortunately the pressure it exerted on the rim caused the rotor of the disk brake to rub against the brake pads when it was engaged. Eventually I mounted the dynamo on the seat-stay and adjusted the mounting angle which produced ideal dynamo contact pressure on the rim, enough to prevent slippage but not enough to create noticeable drag.
At present the
Basil Nordlicht bottle dynamo is still fitted to the
Yuba Mundo, although there are no dynamo lights fitted for it to drive. This is due to my
acquisition of a Brompton. After a few weeks with the
Brompton, I felt that a bike such as this really needed to be all in-one, including self-sufficient lighting. It was around this time that the annual price increases for
Brompton components were being rolled out.
The Brompton dynamo wheel RRP was about to increase by about 15% making that then the ideal time to upgrade to the
Shimano hub dynamo wheel. I had considered the fitting the
Basil Nordlicht bottle to the
Brompton, but the relatively good price of the wheel and my uncertainty about clearances for fitting the bottle led me to choose the hub over the bottle.
Rather than splash out on a new front light, my limited budget led me to fit the
Lyt from the
Yuba Mundo instead. My intention was to replace the front lamp on the
Yuba Mundo at a later date, which I have still yet to do. Initially I bent the
Lyt mount to fit it into the tight space between the caliper brake and the luggage block, a solution which was far from ideal. I was later able to use a
Brompton Cyo mounting bracket to fit the
Lyt into the limited space offered by the
Brompton. I also added a
Brompton rear dynamo light (made by
Spanninga) to complete the set-up
The version of the
Lyt I had purchased for the
Yuba Mundo was the bottle dynamo version; when connected to the hub dynamo on the
Brompton, both front and rear lights ran whenever the bike was in motion. Whilst not as optimal as the automatic on/off light sensor of the
Retro, this set-up actually works well, due to the extraordinary operational lifespan of LEDs. It now appears that I was a little ahead of the curve in choosing this set-up;
B&M's entire 2012 range of dynamo lighting comes with the option for
daylight running lights.
My experiences with dynamo lighting have not been universally positive. The standlight functions on both of the lights fitted to the
Brompton failed by summer, although they were both
relatively easy to fix. However, it is my 'off-label' riding with the
Brompton which is more likely the cause of this failure than any deficiency in the lights' designs;
Bromptons are not really ideal bikes for fast riding on cobbled paths, the resulting vibrations were obviously a bit too much for the capacitors powering the standlight. Under more typical riding conditions I doubt that this problem would have occurred. For this reason I would still strongly recommend dynamo lighting to anyone, including the models of light which I have had problems with.
A great deal of dynamo lighting technology is designed by (or for) the German market. German regulations stipulate that a bicycle must be sold complete with a dynamo lighting system (except lightweight sports-bikes), including lights which conform to specific regulations for beam shape and light intensity. These regulations are more strict than elsewhere and have effectively become the
de facto international standard. The misconceptions about dynamo lighting which persist in the English-speaking world means that we do not constitute a huge proportion of the market for dynamo lighting components, with equipment and information often difficult to come by.
B&M in particular make great equipment but the English-language information about them is lacking. They also suffer from the
Windows Vista effect; huge numbers of variants on each light model exist with relatively subtle differences between them and confusing nomenclature. These differences are seldom well explained in product descriptions on the handful of retailers which stock them.
Because of this, to help prospective dynamo light users I have produced a
B&M dynamo light nomenclature guide:
Lumotec: The front dynamo light brand name.
Toplight: The rear dynamo light brand name.
Retro, Lyt, IQ Fly, IQ Cyo etc: The model name.
Plus: Includes standlight. The light (or a portion of it) remains illuminated for a few minutes after motion stops.
Senseo: Includes automatic on/off
via light sensor.
N: Includes an on/off switch, intended for use with hub dynamos.
B: Basic version, lower light output but still meeting German minimum standard.
R: Taller beam, including near-field illumination of dark patch in front of wheel.
T:
Daylight running lights. In addition to the beam aimed at the road, a series of small LEDs direct light at oncoming traffic to increase cyclist visibility. During the day these lights remain lit, whilst the main beam runs at reduced power or is switched off.
B&M are of course not the only manufacturer of dynamo lights, merely the one with which I have most experience.
Mr Hembrow gives high praise to the new dynamo front lamp manufactured by
Philips; the
Saferide (repeated
elsewhere). It is my hope to test out a
Saferide in the future and share my impressions here. If anyone has any questions about 'going dynamo,' please feel free to leave a comment and I will endeavour to help you if I can.